Click the link below and....Get Sparked!

Monday, November 8, 2010

The DSI Project - Part 3 LCD Disassembly

Below are some Step-by-step shots taken of the disassembly of the LCD used in The DSI Project. It was a 32" TCL brand model L32E9AD.


Sunday, November 7, 2010

So What's Next?

Well now I've made a few different types of Multi-touch devices FTIR, DI, LED-LP, LLP and now DSI...

Now that my DSI project has been done, I think I'm going to move onto different types of multi-touch devices. So where to go from here? Well not sure really, but I think I'll look into how to make Multi-touch screens without modifying existing displays.
Or maybe large wall displays. I would like to create an interactive bench top installed in a kitchen one day...

I can say for sure though... It's been fun! =)

Thursday, November 4, 2010

The DSI Project - Part 2

The DSI Project - Demo Reel from Paul D'Intino on Vimeo.


Hello Again! It's been a long time between posts I know, but I have finally had some time to record the performance of my latest multi-touch table 'The DSI Project' - still haven't come up with a better name =)

This is a Demo Reel of a 32" Multi-touch table showcasing some of the applications used in DIY setups.

Music is by 'The XX's' (website: http://thexx.info/)

This video is also available on YouTube: http://www.youtube.com/watch?v=6vqCVj42y9c

I have also included a diagram explaining the order of the LCD & Touch 'Layers'.
NOTE: The 3 Diffuser Layers are the factory sheets included with the LCD. I had tried variations of using only one or 2, but the result was better with 3 in the end.


As always, stay tuned for more!

Sunday, July 25, 2010

"The DSI Project" - Part 1


Well It's been a busy weekend and I have only just got around to take more pics of the setup. I have named the coffee table "The DSI Project" for lack of a better name =)

The pictures above and left are screenshots of my new Flash AppScroller Menu which I will be releasing in the near future...

Below are some pictures of the inside and make-up of the table, and I have also thrown in a video of the Motorised 3-Port USB Hub that used. It is touch controlled and tucks away nicely when not in use. Makes for a great flush finish...Not bad for AUD$12!

I'll post some specs and measurements hopefully when I get more time...

Until then, as always... Enjoy! =)

The Motorised 3-Port USB Hub:

3-Port Motorised USB Hub from Paul D'Intino on Vimeo.


The first pic is the table complete, and the second is the table with the front bezel off.

Now the side panel must be removed to un-plug the Endlighten panel so it can be removed. (Each side wall is held in with 4 screws and the front and rear have 6)

This is a shot of the LCD panel with a foam surround to protect the edges of the glass panel (I'm not willing to break 2 LCD panels!) The LCD is fixed to a sheet of acrylic - Another sheet of Endlighten in this case which is counter-sunk and fixed into the wood for support and strength.

The top and inside views of the table which I will explain in detail in the next post.


Now the whole table with the pieces.


This is the underside of the bezel showing the cut-out groove for the Endlighten sheet.


The USB Hub, Power socket, Switch and PC Power button...


The finished table... At least for now.. ;-)

Wednesday, July 21, 2010

32" DSI Multitouch Table [Updated]

So now I pretty much have the table completed, and only the finishing touches to go.
I've been away on my honeymoon for 7 weeks and only now just getting back to the multitouch table.

Check out the poorly managed, un-optimised, one-handed filming and demonstration of the table using TouchWorldWind JAVA. =)

TouchWWJ First Test from Paul D'Intino on Vimeo.


I used an old Subwoofer terminal plate to house the power switch and AC plug. =)

I'll be adding more info very soon but for now, here's a couple of pics of what the table looks like...


Cheers!

Monday, May 17, 2010

32" DSI Multitouch Table

For the last couple of months I have been working on a 32" DSI Multitouch table.
There were a few issues in the testing stage where at one point I cracked the LCD ;-(
Very sad times... However, I have a new LCD now and the construction of the table is going very well.

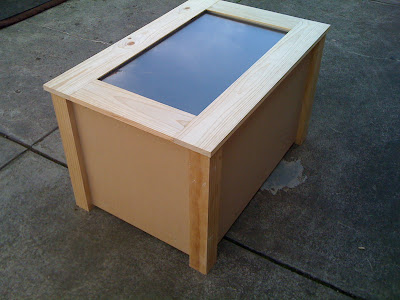
I have attached some pictures of the building stages and will update more when I can.

Enjoy!

(First side of the table)


(Construction coming along)


(Final stages of the construction)


(The lid has been router-ed to house the Endlighten piece)


(Almost final stages)

Friday, April 9, 2010

Concept Apploader Multitouch AS3 Flash Menu


This is the first trial of a Concept Apploader AS3 Flash Menu that uses an XML dynamic background and Icon/Background images. At this stage the applications are hard coded into the AS3 file, however the aim will be to also have those dynamically load from an XML file.

Screenshots and more details will be added soon...

Comments are welcomed =)

Stay tuned...

Thursday, February 11, 2010

Arduino Simple Moisture Tester


This is a simple Moisture Tester that I made using an Arduino MEGA, a 10 Element Bar Graph LED Array (Part Number: HDSP-4832), and some Galvanized Nails as sensor probes.

Essentially, the Arduino measures the resistance between the nails and sends that data to the code which determines how many LED's to light up. The higher the number, the more LED's light up. Simple!

Here's a picture of the circuit.


And a screenshot of the Serial Monitor output from the Arduino Code:


And here's the code:
------------------------------


// Arduino Simple Moisture Tester
// By Paul D'Intino
// Feb 11 2010

//initialize values
int moistureSensor = 0;
int moisture_val;
int lightSwitch1 = 35;
int lightSwitch2 = 37;
int lightSwitch3 = 39;
int lightSwitch4 = 41;
int lightSwitch5 = 43;
int lightSwitch6 = 45;
int lightSwitch7 = 47;
int lightSwitch8 = 49;
int lightSwitch9 = 51;
int lightSwitch10 = 53;


void setup() {
Serial.begin(9600); //open serial port

//setup Digital pins as Outputs
pinMode (lightSwitch1, OUTPUT);
pinMode (lightSwitch2, OUTPUT);
pinMode (lightSwitch3, OUTPUT);
pinMode (lightSwitch4, OUTPUT);
pinMode (lightSwitch5, OUTPUT);
pinMode (lightSwitch6, OUTPUT);
pinMode (lightSwitch7, OUTPUT);
pinMode (lightSwitch8, OUTPUT);
pinMode (lightSwitch9, OUTPUT);
pinMode (lightSwitch10, OUTPUT);

//set all the LEDS to OFF on startup

digitalWrite (lightSwitch1, LOW);
digitalWrite (lightSwitch2, LOW);
digitalWrite (lightSwitch3, LOW);
digitalWrite (lightSwitch4, LOW);
digitalWrite (lightSwitch5, LOW);
digitalWrite (lightSwitch6, LOW);
digitalWrite (lightSwitch7, LOW);
digitalWrite (lightSwitch8, LOW);
digitalWrite (lightSwitch9, LOW);
digitalWrite (lightSwitch10, LOW);
}

void loop() {
moisture_val = analogRead(moistureSensor); // read the value from the moisture-sensing probes
Serial.print("moisture sensor reads "); //output the value from the sensors
Serial.println( moisture_val );

//Step 1 - setup the maximum value with all LEDS on
if (moisture_val >= 1000 )
{
digitalWrite(lightSwitch1, HIGH);
digitalWrite(lightSwitch2, HIGH);
digitalWrite(lightSwitch3, HIGH);
digitalWrite(lightSwitch4, HIGH);
digitalWrite(lightSwitch5, HIGH);
digitalWrite(lightSwitch6, HIGH);
digitalWrite(lightSwitch7, HIGH);
digitalWrite(lightSwitch8, HIGH);
digitalWrite(lightSwitch9, HIGH);
digitalWrite(lightSwitch10, HIGH);
delay(10);
}

//Step 2
else if (moisture_val >= 800 && moisture_val <= 900 )
{
digitalWrite(lightSwitch1, HIGH);
digitalWrite(lightSwitch2, HIGH);
digitalWrite(lightSwitch3, HIGH);
digitalWrite(lightSwitch4, HIGH);
digitalWrite(lightSwitch5, HIGH);
digitalWrite(lightSwitch6, HIGH);
digitalWrite(lightSwitch7, HIGH);
digitalWrite(lightSwitch8, HIGH);
digitalWrite(lightSwitch9, HIGH);
digitalWrite(lightSwitch10, LOW);
delay(10);
}

//Step 3
else if (moisture_val >= 700 && moisture_val <= 800 )
{
digitalWrite(lightSwitch1, HIGH);
digitalWrite(lightSwitch2, HIGH);
digitalWrite(lightSwitch3, HIGH);
digitalWrite(lightSwitch4, HIGH);
digitalWrite(lightSwitch5, HIGH);
digitalWrite(lightSwitch6, HIGH);
digitalWrite(lightSwitch7, HIGH);
digitalWrite(lightSwitch8, HIGH);
digitalWrite(lightSwitch9, LOW);
digitalWrite(lightSwitch10, LOW);
delay(10);
}


//Step 4
else if (moisture_val >= 600 && moisture_val <= 700 )
{
digitalWrite(lightSwitch1, HIGH);
digitalWrite(lightSwitch2, HIGH);
digitalWrite(lightSwitch3, HIGH);
digitalWrite(lightSwitch4, HIGH);
digitalWrite(lightSwitch5, HIGH);
digitalWrite(lightSwitch6, HIGH);
digitalWrite(lightSwitch7, HIGH);
digitalWrite(lightSwitch8, LOW);
digitalWrite(lightSwitch9, LOW);
digitalWrite(lightSwitch10, LOW);
delay(10);
}


//Step 5
else if (moisture_val >= 500 && moisture_val <= 600 )
{
digitalWrite(lightSwitch1, HIGH);
digitalWrite(lightSwitch2, HIGH);
digitalWrite(lightSwitch3, HIGH);
digitalWrite(lightSwitch4, HIGH);
digitalWrite(lightSwitch5, HIGH);
digitalWrite(lightSwitch6, HIGH);
digitalWrite(lightSwitch7, LOW);
digitalWrite(lightSwitch8, LOW);
digitalWrite(lightSwitch9, LOW);
digitalWrite(lightSwitch10, LOW);
delay(10);
}


//Step 6
else if (moisture_val >= 400 && moisture_val <= 500 )
{
digitalWrite(lightSwitch1, HIGH);
digitalWrite(lightSwitch2, HIGH);
digitalWrite(lightSwitch3, HIGH);
digitalWrite(lightSwitch4, HIGH);
digitalWrite(lightSwitch5, HIGH);
digitalWrite(lightSwitch6, LOW);
digitalWrite(lightSwitch7, LOW);
digitalWrite(lightSwitch8, LOW);
digitalWrite(lightSwitch9, LOW);
digitalWrite(lightSwitch10, LOW);
delay(10);
}

//Step 7
else if (moisture_val >= 300 && moisture_val <= 400 )
{
digitalWrite(lightSwitch1, HIGH);
digitalWrite(lightSwitch2, HIGH);
digitalWrite(lightSwitch3, HIGH);
digitalWrite(lightSwitch4, HIGH);
digitalWrite(lightSwitch5, LOW);
digitalWrite(lightSwitch6, LOW);
digitalWrite(lightSwitch7, LOW);
digitalWrite(lightSwitch8, LOW);
digitalWrite(lightSwitch9, LOW);
digitalWrite(lightSwitch10, LOW);
delay(10);
}

//Step 8
else if (moisture_val >= 200 && moisture_val <= 300 )
{
digitalWrite(lightSwitch1, HIGH);
digitalWrite(lightSwitch2, HIGH);
digitalWrite(lightSwitch3, HIGH);
digitalWrite(lightSwitch4, LOW);
digitalWrite(lightSwitch5, LOW);
digitalWrite(lightSwitch6, LOW);
digitalWrite(lightSwitch7, LOW);
digitalWrite(lightSwitch8, LOW);
digitalWrite(lightSwitch9, LOW);
digitalWrite(lightSwitch10, LOW);
delay(10);
}

//Step 9
else if (moisture_val >= 100 && moisture_val <= 200 )
{
digitalWrite(lightSwitch1, HIGH);
digitalWrite(lightSwitch2, HIGH);
digitalWrite(lightSwitch3, LOW);
digitalWrite(lightSwitch4, LOW);
digitalWrite(lightSwitch5, LOW);
digitalWrite(lightSwitch6, LOW);
digitalWrite(lightSwitch7, LOW);
digitalWrite(lightSwitch8, LOW);
digitalWrite(lightSwitch9, LOW);
digitalWrite(lightSwitch10, LOW);
delay(10);
}

//Step10 - setup the minimum value with all LEDS off but one Red LED.


else
{
digitalWrite(lightSwitch1, HIGH);
digitalWrite(lightSwitch2, LOW);
digitalWrite(lightSwitch3, LOW);
digitalWrite(lightSwitch4, LOW);
digitalWrite(lightSwitch5, LOW);
digitalWrite(lightSwitch6, LOW);
digitalWrite(lightSwitch7, LOW);
digitalWrite(lightSwitch8, LOW);
digitalWrite(lightSwitch9, LOW);
digitalWrite(lightSwitch10, LOW);
delay(10);
}

}


Wednesday, February 3, 2010

MultiTouch using IR Pen & WorldWind JAVA - Concept Test 1


This is the first Concept Test of a Multi-touch device using only 1 IR Pen.

Ordinary 'single' touch controls are possible when the IR Pen is touching the screen, and also Multi-touch 'pinch' gestures for zooming by brining the IR Pen closer or further away from the screen.


.

Tuesday, February 2, 2010

PS3 Eye Lens Test

With my portable 17" Multi-touch screen I recently built, I have been using the 2.1mm FishEye lens on my PS3 Eye camera with great success.

I have just started a 32" DSI setup and the 2.1mm lens is too distorted to detect blobs on the edge of the screen.

So I recently bought a pack of 6 lenses from DealExtreme to try different angles.
The product is called "2.8mm~16mm Fixed IRIS Lens Set for Webcams and Security/CCTV Cameras (6-Lens Pack)" and it costs USD$14.91.


I have posted a screenshot below of the output from the PS3 Eye using the different lenses.